Donna Kelce's Cookie Recipe
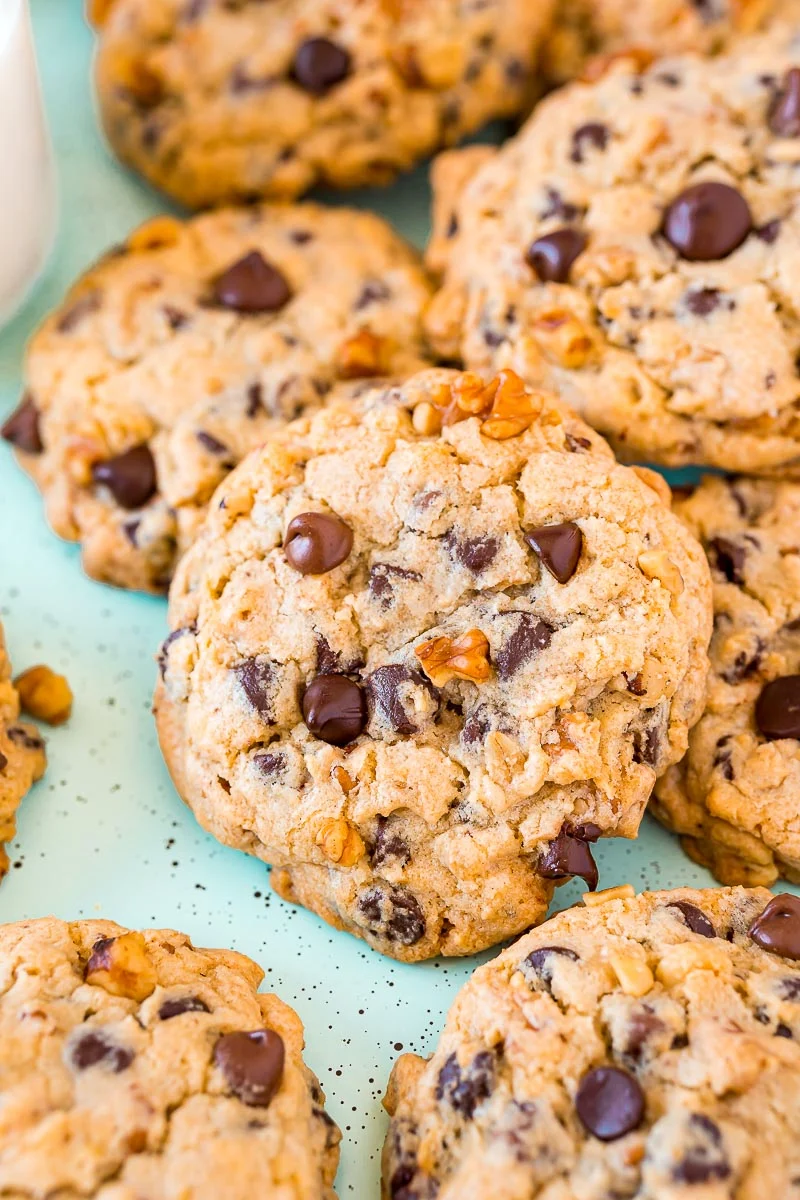
Donna Kelce's Chocolate Chip Cookies are a winning recipe that has taken over social media! These homemade cookies are chewy with crispy edges and packed with a mouthwatering flavor of crunchy chopped pecans, sweet white chocolate, milk chocolate chips, and cozy cinnamon. It's no wonder everyone is raving about them!

Crunchy chopped pecans, sweet white chocolate, milk chocolate chips, and cozy cinnamon stand out in Mama Kelce’s Cookies!
Mouthwatering sweet, cozy flavor nestled in chewy homemade cookies with crispy edges, a touchdown chocolate chip recipe that has taken over social media, the NFL, and Swifties alike!
Cookies Just Like Mama Kelce Always Makes
Donna Kelce, mother of NFL stars Travis and Jason Kelce, was seen handing her sons a container of her freshly baked chocolate chip cookies before the boys faced off against each other in the 2023 Super Bowl. The whole world watched the exchange and immediately wanted to know just how good Mama Kelce’s homemade cookies were!
From that heartfelt exchange, her chocolate chip cookies instantly became famous! And for a good reason, too: Mama Kelce’s Homemade Chocolate Chip cookies are made with a combination of white and milk chocolate chips for a delicious balance of sweetness, chopped pecans for crunchy goodness, and a hint of cinnamon to ensure a cozy touch of comfort.
Basically, a Chocolate Chip Cookie meets a Butter Pecan Cookie!
These chewy, crispy-edged cookies are made with simple ingredients and deliver mouthwatering flavors that will be an instant touchdown with anyone! Mama Kelce makes them for charity bake sales, to bring her boys a taste of home, and I’m sure her son’s girlfriend, Taylor Swift, has even tried them.
Save This Pin For Later!And I can promise you that this is the most tested and perfected version of her famous cookie recipe on the internet!
Donna Kelce Cookie Ingredients
You’ll find that Donna Kelce’s Chocolate Chip Cookie Recipe is filled with pantry staple ingredients such as salted butter, light brown sugar, granulated sugar, eggs, vanilla extract, salt, and ground cinnamon. It’s also made with a combination of all-purpose flour and cake flour, giving the cookies structure as well as giving them a tender, chewy crumb.
To create more texture and flavor, this recipe is made with both baking powder and baking soda. Donna Kelce even let us in on her tip of dissolving the baking soda in warm water to activate the leavening agent and evenly disperse it throughout the cookie dough.
Finishing off the cookie dough are white chocolate chips, milk chocolate chips, and chopped pecan pieces which can be optional! Kelce does recommend using Ghirardelli brand chocolate chips for their high-quality flavor!
Cookie Dough Testing
I completed 4 rounds of testing on these cookies and tried to stay true to the original recipe while ensuring the best results. We tested a hand mixer vs the stand mixer and found no noticeable difference. All batches were made using a stopwatch at the exact times in the recipe to keep things consistent.
Ultimately, we found that depending on the type of cookie you want, there are two ways to make them with only one slight change: the amount of flour.
When making these cookies using our standard weighted measurements of 130g per cup of flour (what you get when you spoon and level off a cup with a knife), the results yielded thinner, crunchier, and chewier cookies. This may be the preferred texture of some, but it’s not my preference. They were also noticeably greasy, after all, 3 sticks is a lot of butter.
So, anyway, I started thinking back to how my mom and mother-in-law measure their flour. They scoop into the bag or container with the measuring cup and shake it from side to side to level off the top. This yielded a weighted measurement of about 155g per cup of flour, resulting in about a 19% increase in flour in the recipe.
The additional flour resulted in cookies that were a bit thicker with crisp edges and chewy but soft centers. For me, these were the best and likely more true to the ones Donna makes.
How To Make Mama Kelce’s Famous Cookie Recipe
- Melt salted butter in the microwave. Afterward, transfer the melted butter into a large bowl and allow it to cool.
- Add light brown sugar and granulated sugar into the bowl of melted butter. Mix the sugars and butter using a hand mixer.
- Mix in the large egg, additional large egg yolk, and vanilla extract. Be sure to scrape the sides of the bowl down as you go!
- Dissolve the baking soda with hot water in a small prep bowl. Then stir it into the butter mixture by hand.
- Mix all-purpose flour, cake flour, salt, baking powder, and ground cinnamon together in a separate bowl. Afterward, beat the dry ingredients into the melted butter and sugar mixture a little to a time at low speed.
- Fold the white chocolate chips, milk chocolate chips, and pecan pieces into the cookie dough.
- Scoop the cookie dough out onto a parchment paper-lined baking sheet, stacking the balls two high. Transfer the baking sheet of cookie dough to the fridge to chill. See notes below for chill test results.
- Transfer the chilled balls of cookie dough onto a new baking sheet freshly lined with parchment paper and preheat the oven.
- Press additional chopped pecans into the tops of cookies.
- Bake the homemade chocolate chip cookies until they become golden brown.
- Swirl inside a large circular biscuit or cookie cutter or a plastic bowl to reshape them and help make them a little thicken.
- Immediately press additional chocolate chips into the tops of the baked cookies to give them a more finished look!
Chilling The Dough
During our recipe testing, I tried different chill methods with widely varying results. These results and recommendations are for the increased flour that the recipe calls for. The notes in the recipe card will contain tips for the thinner cookie option.
Chill in a bowl – this made the dough WAY too tough to scoop after chilling, which meant a lot more work. I don’t recommend this method.
Scooping before chilling – Taking the time for this extra step before chilling means saving a lot of time later and delivering more consistent results.
Chilling for 3 hours – A delicious cookie you can enjoy the same day you make them. Lighter in color with less caramelization and flavor development than those with a longer chill.
Fridge chill for 24 hours – My husband’s favorite of the test cookies. The sugar felt a bit more crystalized within the cookie, and it was chewier.
Freezer chill for 24 hours – My personal favorite of the bunch. These cookies were the perfect blend of crispy, chewy, and soft.
- Butter – I prefer baking with high-quality Irish or European grass-fed butter since it has a higher fat content and lower water content, resulting in baked goods with richer flavor. However, you can use sweet cream butter (which is what the original recipe calls for).
- Double Stacked Cookie Dough – Double stacking scoops of cookie dough give the baked cookies a bit more thickness and a perfectly chewy, gooey center! This accomplishes the same thing as rolling the balls into cylinders but with less hands-on work.
- Chill Time – Scoop and stack the dough, then chill the cookie dough uncovered for at least 1 hour. Then, cover them with plastic wrap and chill for an additional 2 hours or preferably 24. The chill time produces cookies with a delicious, well-developed caramel flavor!
- Cinnamon – You may want to consider reducing the ground cinnamon to 3/4 teaspoons if you’re baking these cookies a day in advance of enjoying them. While the cinnamon does add cozy flavor to the cookies it can be a bit intense a day or two after baking.
How To Store Kelce Cookies
Once Kelce’s Chocolate Chip Cookies have cooled, transfer them into an airtight container or Ziploc bag with the excess air squeezed out of it. Then store them at room temperature to enjoy for 3 to 4 days.
How To Freeze Chocolate Chip Cookies
Freezing homemade chocolate chip cookies is a great way to prep for gatherings ahead of time or to have a ready-to-bake treat in the freezer for guests! Freezing cookie dough is also perfect for a late-night sweet treat, simply pull one or two from the freezer to bake without creating a kitchen mess, a true win-win!
To freeze cookie dough, follow the instructions of the recipe up to the portioning out of the dough and double stacking the scoops on a parchment paper-lined baking sheet. Then instead of transferring the baking sheet into the fridge for a second chill, place it in the freezer to flash freeze the dough.
This will prevent the cookie dough from freezing together in one big ball. After an hour or so, transfer the frozen cookie dough balls into a Ziploc bag or freezer-safe container and store the dough in the freezer for up to 3 months.
To freeze baked cookies, spread the cookies out onto a baking sheet and flash-freeze them in the freezer. Afterward, transfer the flash-frozen baked cookies into a Ziploc bag or freezer-safe container and store them in the freezer for up to 3 months.
To enjoy, thaw the baked cookies at room temperature or nuke them in the microwave one at a time for 15 seconds.
More Cookie Recipes
- Peanut Butter Cookies – Loaded with roasted peanuts and Reese’s Peanut Butter Chips!
- Oatmeal Raisin Cookies – Made with brown butter for a cozy, delicious cookie!
- Toll House Cookies – The BEST recipe for Toll House Cookies, trust me!
- Pumpkin White Chocolate Chip Cookies – A Fall cookie you don’t want to miss!
- Soft Brown Sugar Cookies – Comes together with minimal ingredients!
Steps
Melt in the microwave at 20-second increments (do not overdo it!). Pour the melted butter into a large bowl and cool for 15 to 20 minutes. I found slicing the butter into tablespoons made for a more even melt.
Add and to the butter mixture and mix with a hand mixer for 4 minutes.
Scrape down the sides of the bowl and add , , and and mix for 30 seconds.
Add to a small prep bowl with and stir to dissolve. Stir into the butter mixture with a rubber spatula.
In a separate bowl, add , , , , and and mix to combine. Add this mixture ½ cup at a time to the bowl, beating on low after each addition just until combined and scraping down the sides of the bowl as needed.
Fold in and , as well as , if desired, with a rubber spatula.
Using a medium cookie scoop, scoop the balls (1.5 tablespoons—about 1.1 oz. each) onto a parchment-lined baking pan. Stack the balls two high and chill for 1 hour before covering them with plastic wrap (the dough is soft and any pressure from covering could squish them). Refrigerate them for at least 3 hours, preferably 24.
Preheat the oven to 350°F and line a fresh baking pan or cookie sheet with parchment paper. Place the cookie dough balls on the baking pan, leaving 3 inches between scoops. I recommend baking no more than 8 cookies per 12x17-inch pan. Use two cookie pans to rotate batches, ensuring the pans have cooled before baking the next batch on them.
Press additional chopped pecans into the tops of the dough before baking. You don't want to do this after, like with the chocolate chips, because we want the pecans to toast and have a better flavor.
Bake for 11 to 14 minutes, rotating halfway through; most of the cookie will be golden (more so on the edges). If baking from frozen, bake for 12 to 15 minutes.
Swirl inside a large circular biscuit or cookie cutter or a plastic bowl to reshape them and help make them a little thicken.
Press additional chocolate chips into the tops of the freshly baked cookies. This gives them a more polished look (and extra chocolate!)
Let the cookies cool on the pan for about 5 minutes after swirling and adding chips before transferring to a wire rack to finish cooling.
Notes
During testing, the results yielded thinner, crunchier, and chewier cookies when making these cookies using our standard weighted measurements of 130g per cup of flour (what you get when you spoon and level off a cup with a knife). This may be the preferred texture of some, but it's not my preference.
Anyway, I started thinking about how my mom and mother-in-law (and all the other 90s moms) measure their flour. They scoop into the bag or container with the measuring cup and shake it from side to side to level off the top. This yielded a weighted measurement of about 155g per cup of flour, resulting in a 19% increase in flour in the recipe.
The additional flour resulted in cookies that were a bit thicker, with crisp edges and chewy but soft centers. For me, these were the best and likely more true to the ones Donna makes.
If you are using the spoon and level method, you'll actually want to use 2 1/3 cup + 1 tablespoon of all purpose and 1 1/4 cup cake flour.
If you like the thinner cookies, use 260g of all-purpose flour and 130g of cake flour with no additional changes to the recipe. It's VERY important that the dough is chilled because it is super soft. You also need to pop your pan in the freezer for 5 minutes before putting the dough on to bake each round, this helps prevent spreading. You want to let them cool on the pan for 10 to 15 minutes before they are set enough to transfer to a wire rack.
- Scooping before chilling - Taking the time for this extra step before chilling means saving a lot of time later and delivering more consistent results.
- Chilling for 3 hours - A delicious cookie you can enjoy the same day you make them. Lighter in color with less caramelization and flavor development than those with a longer chill.
- Fridge chill for 24 hours - My husband's favorite of the test cookies. The sugar felt a bit more crystalized within the cookie, and it was chewier.
- Freezer chill for 24 hours - My personal favorite of the bunch. These cookies were the perfect blend of crispy, chewy, and soft.
Nutrition
- Calories226
- Carbs28g
- Protein2g
- Fat13g
- Saturated fat7g
- Fiber1g
- Sugar19g
- Sodium187mg
Estimates per serving, when a serving size is listed.